If you would like to purchase or receive the Bitcoin, Litecoin or other crypto coins, you would probably need a wallet to do it successfully. In this post, I will show you how to create a cryptocurrency wallet account on the worldwide trusted company – on Coinbase
What do you need for successful registration?
Firstly, you need to check if is your country accepted by Coinbase. You can find this information in our previous review in section 4: List of the supported countries.
Is your country of residence accepted by Coinbase?
Perfect, in the next step you need to prepare the following:
- Your ID document or Driver License – preferable both. You will use these documents for the verification of your account and increasing the trading limits.
- An Email address – you will register your account to this address so its need to be accessible during the registration. After successful registration, all notifications will be sent you by email as well.
- Phone number – Coibase will send you the verification code to your phone too. You can set up the two-factor authentication later and use for it your phone number.
So let’s start with the registration:
Step 1: Go to Coinbase
Visit the Coinbase registration website. You can do it by clicking to the following link.
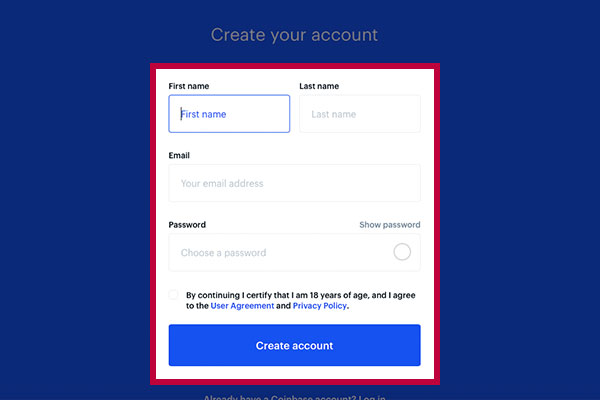
Step 2: Fill the details about yourself
On the registration website, you have to fill the following details about you: your First and Last name, the email address which will be used for the registration. You have to type your password which you need to remember of course. Maybe there will be needed the verification that you are not a robot. Just pass the verification and submit the information you provided by clicking on the Create Account button.
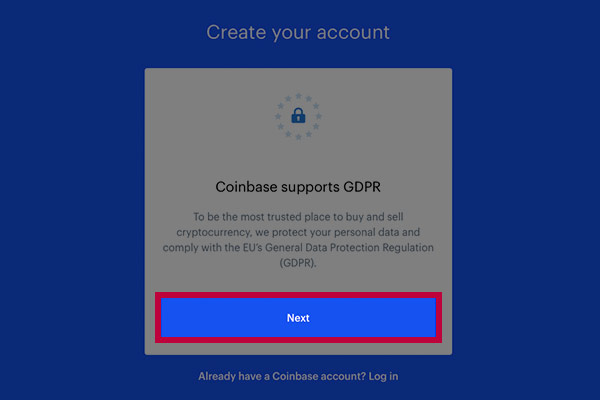
Step 3: Accept the GDPR
If you live in the European Union you have to accept the GDPR basics. You can do it by clicking on the Next button and after it, click on the button I acknowledge.
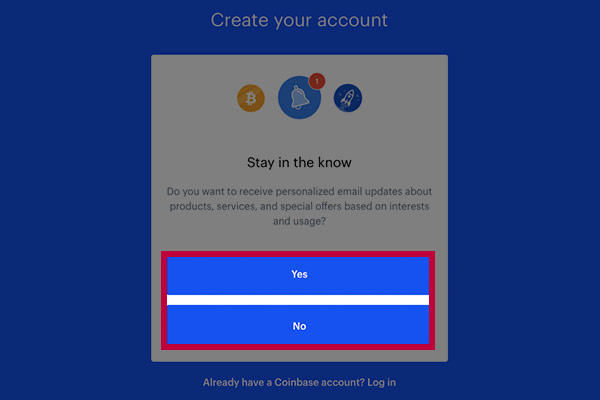
Step 4: Accept or reject the email updates
If you would like to receive the personalized email updates about products, services and special offers based on your account usage click yes. Otherwise, click no.
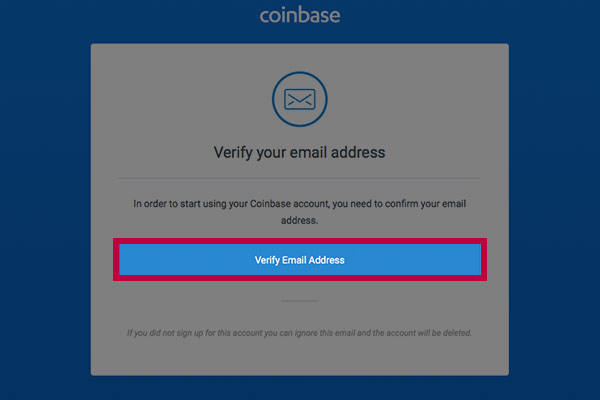
Step 5: Verify your email address
After registration, you need to verify your email address. Wait for an email from Coinbase containing the verification information and follow them. Generally, you have to click on the Verify Email Address button.
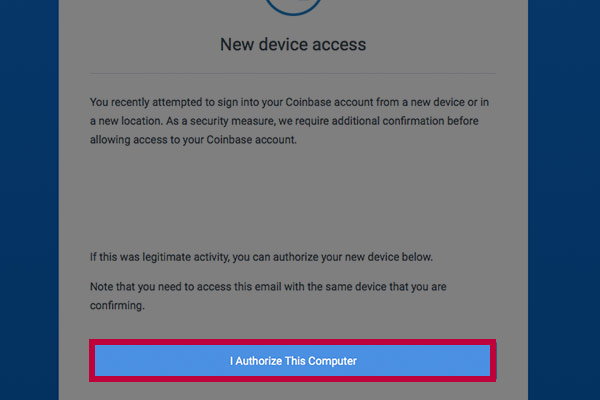
Step 6: Authorize a new device
If you didn’t see this message in your browser, you can skip to the next step. If you see it, you need to open your email inbox once more and click on the authorization button in the new email which was delivered to you a few seconds ago.
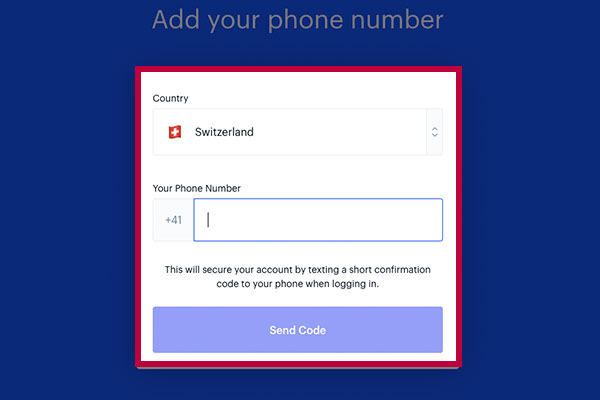
Step 7: Add your phone number
In this step, you need to fill in your phone number and verify it by filling the confirmation number received in your messages inbox. This allows Coinbase to send you a verification code whenever you will log in to your account.
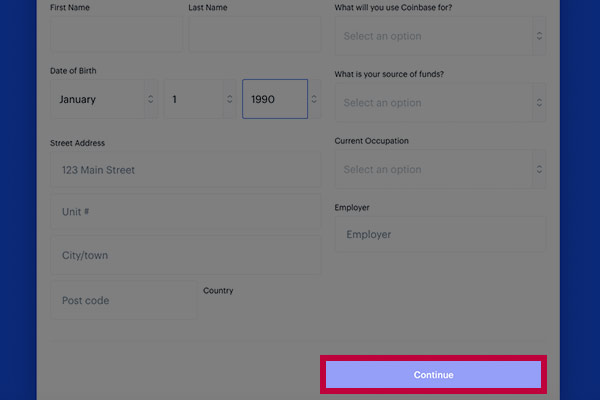
Step 8: More information about you
After phone verification, you need to provide more information about you. You need to fill the date of birth, your address, and information about how you will use your Coinbase account. When you have all
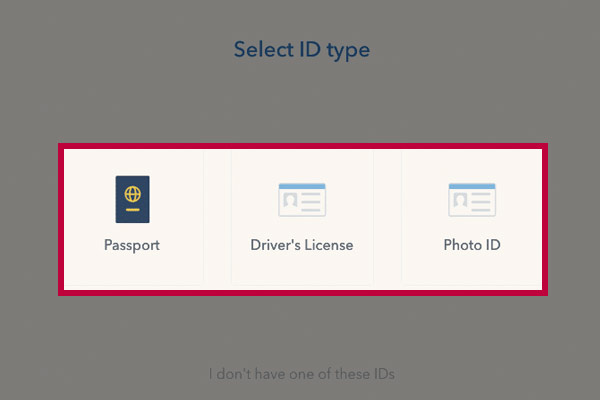
Step 9: Identity verification
As a next step, you need to verify your identity to unlock all features of the Coinbase. You can pass the verification by providing your ID or driving license photo.
So choose the desired document for the account verification and follow the steps shown in the verification form.
Step 10: Add preferred payment method
After account verification, you probably would like to top up your account with the money, in order to purchase the crypto coins. For funding the Coinbase account you can use the Bank transfer, Credit or Debit card. To set up the preferred payment method click on the avatar button in the top right corner, and choose the settings option.
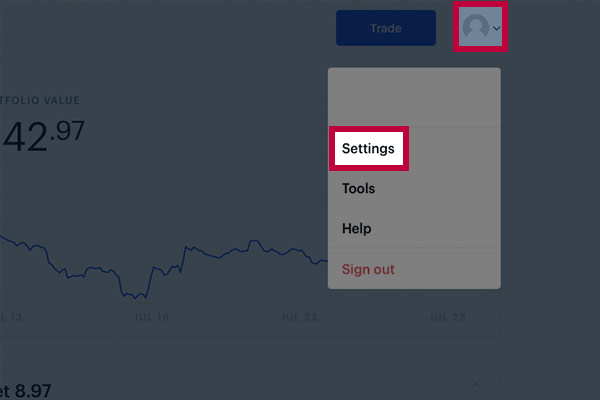
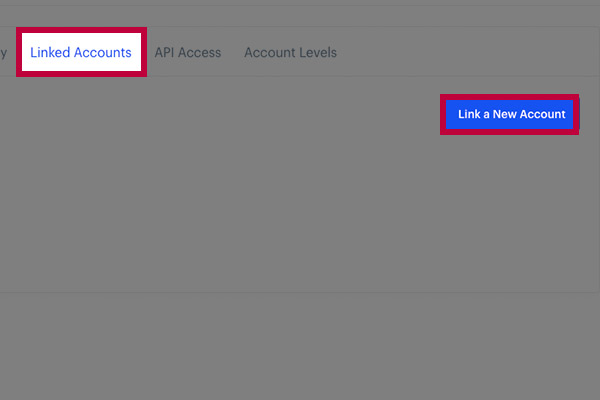
Next, click on the linked accounts, and then click to link a new account. For this guide purposes, I will show you how to add the Debit card as the payment method.
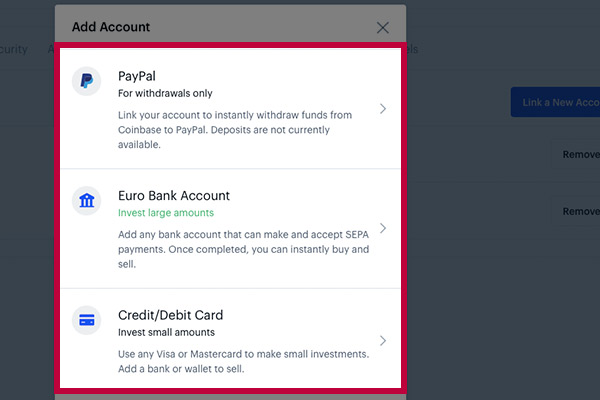
Choose the preferred payment method (in our case the Credit/Debit card).
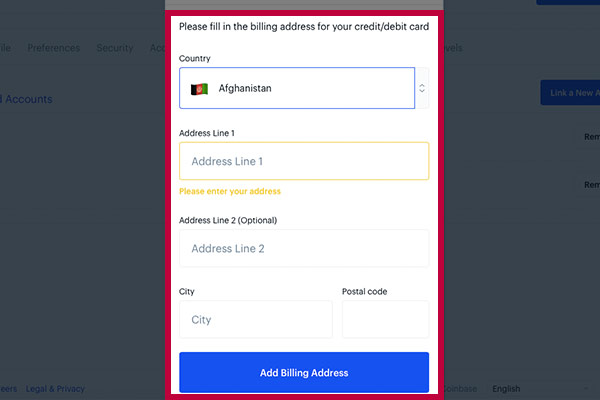
Fill the requested billing information, this information will be used during the purchases.
In the next step the fill the information about your card.
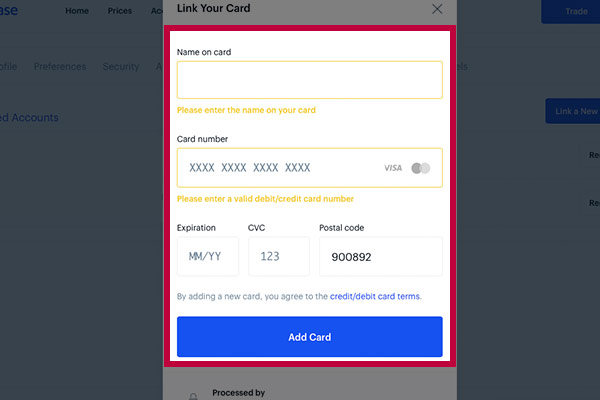
Double-check the filled information and if everything is okay, click on the Add Card button.
Everything is done
Congratulations! You have your Coinbase account ready to buy, sell, send or receive the cryptocurrency. For the buying any crypto coin offered, click on the trade button. After the popup window is shown, you can choose which coin do you like to purchase and which payment source will be used for payment.
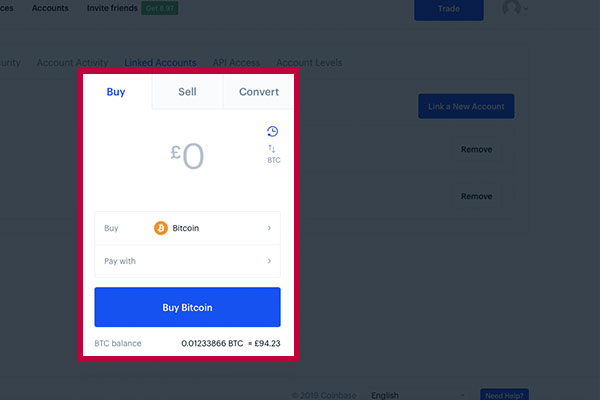
At the time of writing this article, Coinbase supports the following crypto coins: Bitcoin (BTC), Ethereum (ETH), Ripple (XRP), Litecoin (LTC), Bitcoin Cash (BCH), EOS (EOS), Stellar Lumens (XLM), Chainlink (LINK), Ethereum Classic (ETC), Zcash (ZEC), Basic Attention Token (BAT), 0x (ZRX), Augur (REP), Dai (DAI).


 Buy crypto, gold and stocks in secondsCheck out our Revolut review with information how you can buy crypto, stocks or commodities for free!
Pingback: ZenGo wallet review - The the first keyless cryptocurrency wallet - We Hold Crypto
Pingback: Which cryptocurrency to invest in 2020 - We Hold Crypto